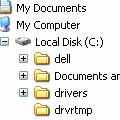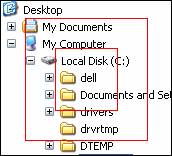
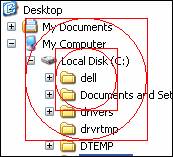
The idea is to take a section of a display, the inner red rectangle, and expand it to the size of the outer red rectangle, thus we have MAGNIFIED the inner section.
Using the Windows GDI, this is relatively easy if we stick to RECTANGLES ...
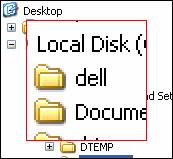
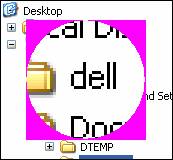
Of course, optimally, most would PREFER the drawing as circles ... a sort of bubble effect ...
It was relatively EASY to get to this stage ... using regions, and a color fill. The idea is that this is to be the transparent region ...
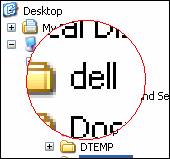
But with some WORK, trying lots of different coding, eventually got exactly what I wanted ...
Some of the HARD WORK was getting this done in around 500 microseconds (0.0005 seconds), so I could use it in mouse tracking. My initial trials were using GetPixel(), PutPixel(), but this was 'costing' 6000 microseconds, or more, so I had to find a way using the BitBlt() services ...
Actually, at the moment the addition of the red circle outline alone is still costing around 100 microseconds, which is out of proportion, so I left a way to turn it off ... It is a shame there seems no way to turn off the 'fill-with-current-brush' of Ellipse. Well, maybe there is, when I think about it more! Maybe I could create a 'hollow' brush (BS_HOLLOW) and then use the Ellipse() function ... YOWEE! THAT WORKED, and chopped about 50 microseconds off the time ;=))
This links to the full code module, testMag.cxx ... this is part of my testap3 project. But below is an extract of the essential code that actually does the 'magnify' ...
The SIZE sz is the inner rectangle to be magnified, and SIZE size is the new magnified size. The HRGN rgn3 is made up of -
 rgn1 = CreateEllipticRgn(0,0,size.x,size.y);
 rgn2 = CreateRectRgn    (0,0,size.x,size.y);
 rgn3 = CreateRectRgn    (0,0,size.x,size.y);
 CombineRgn( rgn3, rgn2, rgn1, RGN_DIFF ); // subtract center ellipse
to get a combined outer region.
Here is JUST the sequence of BitBlt, without the setup, and 0x220326 is NOTSRCAND - It is numbered in 8 stages, with the bitmap image of each stage shown below.
1. BitBlt( dcIn, 0, 0, sz.x, sz.y,      hdcDst, x, y,      SRCCOPY );
2. StretchBlt(dcImg,0,0,size.x,size.y,  dcIn,0,0,sz.x,sz.y,SRCCOPY);
3. FillRgn( dcImg, rgn3, hbrclrTransparency );
   SetBkColor(dcImg, clrTransparency);
4. BitBlt (dcAnd, 0, 0, size.x, size.y,  dcImg, 0, 0,      SRCCOPY);
   BitBlt (dcXor, 0, 0, size.x, size.y,  dcImg, 0, 0,      SRCCOPY);
5. BitBlt (dcXor, 0, 0, size.x, size.y,  dcAnd, 0, 0,      0x220326);
6. BitBlt (dcTemp, 0, 0, size.x, size.y, hdcDst, x, y,     SRCCOPY);
7. BitBlt (dcTemp, 0, 0, size.x, size.y, dcAnd, 0, 0,      SRCAND);
8. BitBlt (dcTemp, 0, 0, size.x, size.y, dcXor, 0, 0,      SRCINVERT);
   BitBlt (hdcDst, x, y, size.x, size.y, dcTemp, 0, 0,     SRCCOPY);
Sequence of eight (8) BITMAPS ...
|
1. Original |
2. Magnified |
3. Color Mask |
4. And |
|
|
|
|
|
|
5. Xor |
6. Background |
7. SRCAND |
8. SRCINVERSE |
|
|
|
|
|
| 1. | Original | This is the original image. |
| 2. | Magnified | The image magnified. |
| 3. | Color Mask | Color added to area to be transparent. |
| 4. | And | An AND mask. |
| 5. | Xor | An Xor mask. |
| 6. | background | The current underneath image. |
| 7. | SRCAND | After applying the 'And' mask. |
| 8. | SRCINVERSE | After applying the 'Xor' mask. |
Then this final image is bitted to the screen. Simple ;=))
Geoff.
Friday, January 04, 2008.
EOF - Magnify-01.doc